New Inbound
Table of Contents
- 1. Features — Basic Info / Inbound Items / Submit
- 2. FAQ — 7 Questions + Important Notes
- 3. Related Features
1. Features
Creating an inbound order means giving the warehouse a delivery plan before the goods arrive — telling it which products are coming in this shipment, how many of each, from which supplier, and when. When the goods arrive, the warehouse counts them item by item against this order to confirm the actual receipt matches the plan. One inbound order can include several products; once created, its status is "Pending", waiting for the warehouse to receive it.
Quick Navigation: Basic Info | Inbound Items | Submit
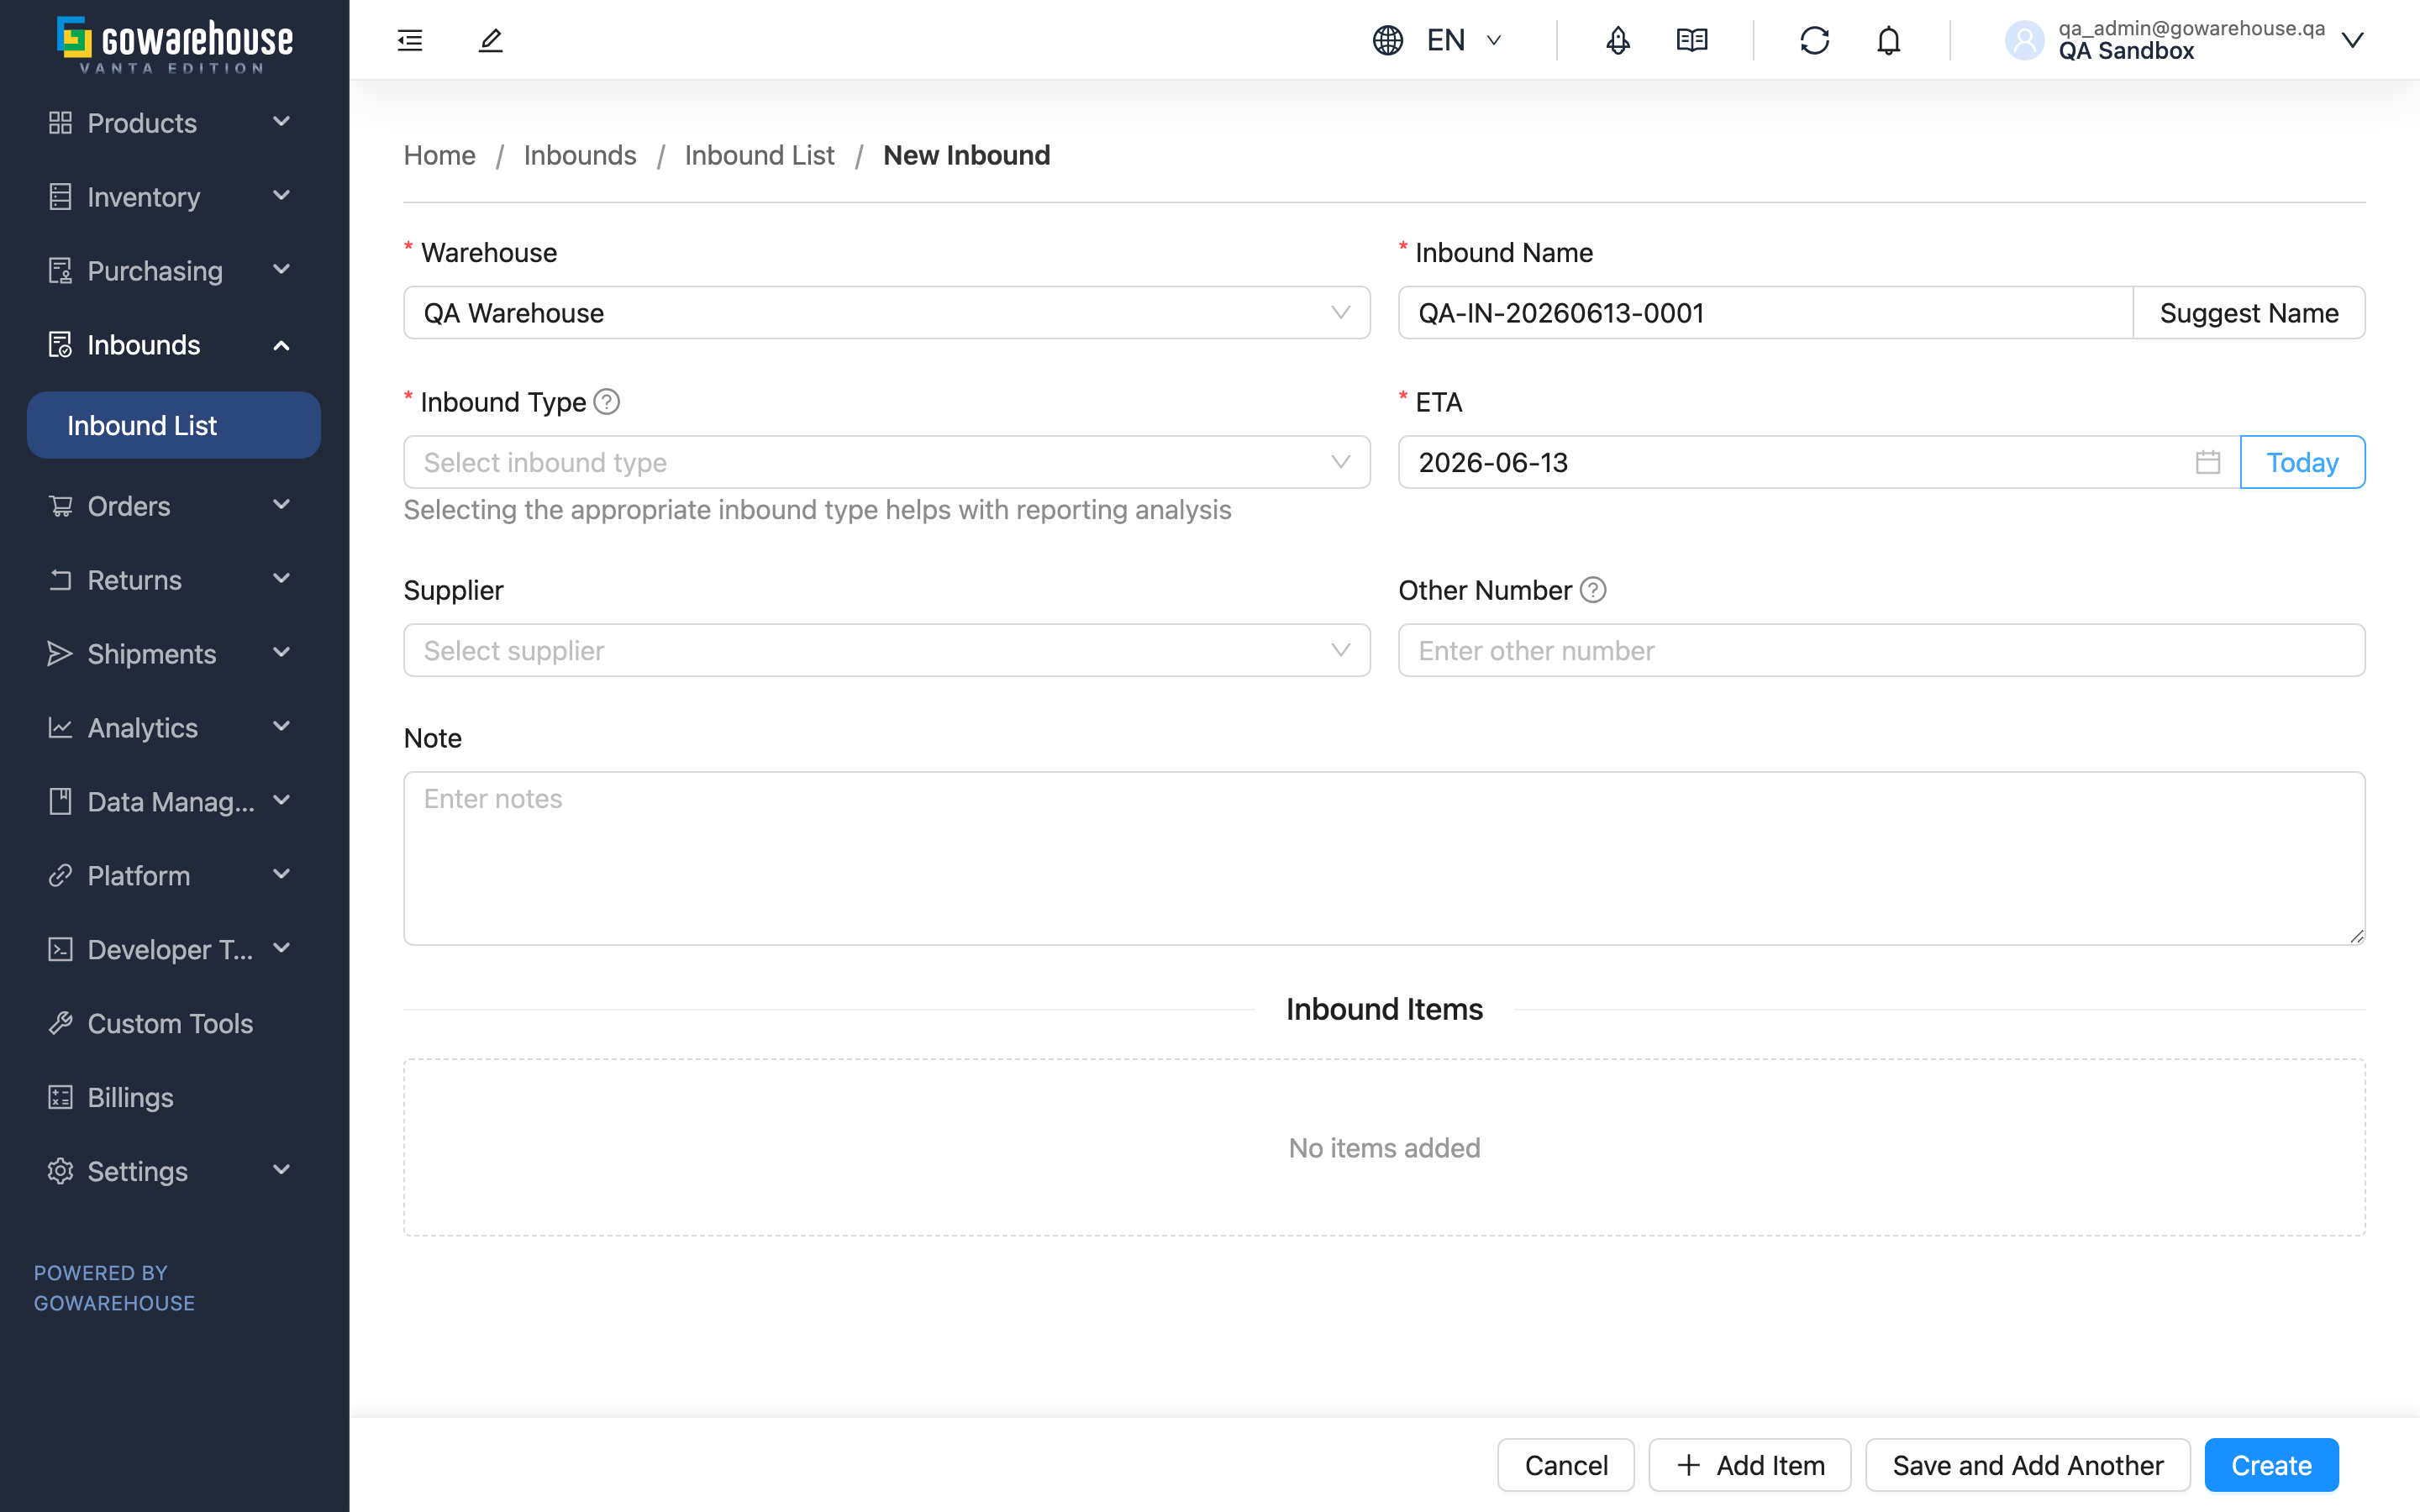
1.1 Basic Info
Fields marked with * are required.
| Field | How to fill in | Notes |
|---|---|---|
| *Warehouse | Choose which warehouse this shipment goes to | Fixed once created; cannot be changed when editing |
| *Inbound Name | Enter a name that identifies this shipment | Must be unique within the same merchant; click "Suggest Name" to have the system generate a unique number |
| *Inbound Type | Choose the source/nature of this shipment | "Receiving", "Sales Return", or "Production"; differences in FAQ |
| *ETA | Select the date the goods are expected to arrive | Today or later only; click "Today" to set today quickly |
| Supplier | Choose a supplier from the dropdown | If the supplier is missing, add it in supplier management first |
| Other Number | Enter a purchase-order or shipping number from a third-party system | Optional, for later cross-reference |
| Note | Enter special handling notes, etc. | Optional |
1.2 Inbound Items
Click "Add Item" to add each product in this shipment; at least one item is required to submit. Each item has the following fields:
Fields marked with * are required.
| Field | How to fill in | Notes |
|---|---|---|
| *Product | Search by SKU or product name and select | The product must already exist in your product data; create it in product management first if missing |
| *Inventory Type | Choose an inventory classification (e.g., sellable, defective) | Required; the first inventory type is auto-filled when you add an item, so adjust as needed |
| Batch | Enter the product's batch number | Optional when creating the order; can be left blank — required (if applicable) only at warehouse acceptance |
| Manufacturing Date | Select the manufacturing date | Optional when creating the order; can be left blank |
| Expiration Date | Select the expiration date | Optional when creating the order; can be left blank |
| *Total Quantity | Enter the total quantity expected for this product | Required; cannot be negative |
1.3 Submit
The action bar at the bottom of the page offers:
- Create: Create this inbound order and go straight to its details page.
- Save and Add Another: Create it, then clear the form and stay on this page to create several orders in a row.
- Add Item: Add another product to the item list.
- Cancel: Discard and return to the previous page.
2. FAQ
Quick Navigation: FAQ | Important Notes
2.1 FAQ
▪ How do I choose the inbound type?
Choose by the source of the shipment: "Receiving" is regular purchasing or restocking from a supplier; "Sales Return" is products a customer returned to the warehouse; "Production" is goods received after processing or assembly. Choosing the right type helps with later reporting and billing.
▪ What does "Suggest Name" generate?
The system generates a unique inbound order name based on the merchant's naming rule and fills it into the name field. You can also replace it with a name that makes sense to you (e.g., "Supplier A - Spring New Arrivals"), as long as it is unique within the same merchant.
▪ What if I can't find the product I want to add?
The item list only lets you choose products that already exist in your product data. If your search returns nothing, create the product in product management first, then come back to create the inbound order.
▪ Are batch and expiration date always required?
Not when creating an inbound order — batch, manufacturing date and expiration date are all optional at the new/edit stage and can be left blank. These tracking details are only required later, when the goods actually arrive and the warehouse performs acceptance, based on the product's own settings (whether batch management or manufacturing-date tracking is enabled). In other words, create the plan first and fill in the batch and dates at acceptance.
▪ Is there a faster way to create many inbound orders?
Put multiple products from the same shipment into one inbound order by adding each with "Add Item". For several separate orders, use "Save and Add Another" to create them one after another; if your data is already in Excel, use the batch import on the list page instead (see Inbound List).
▪ Can I still modify it after creating?
Yes, but only in "Pending" status. Once the warehouse starts receiving, the order is locked (see Edit Inbound).
▪ Can the expected arrival date be in the past?
No — only today or a later date. This field is for the warehouse to schedule receiving, so a past date has no meaning.
2.2 Important Notes
⚠️ Important Reminders
- Products in the item list must already exist in your product data; you cannot create a new product here on the fly.
- The inbound warehouse is fixed once created and cannot be changed when editing; if you picked the wrong one, cancel and create a new order.
- After creation, only "Pending" status can be modified; the order locks once the warehouse starts receiving.
💡 Tip: Use a recognizable name (supplier + batch + date) so it's faster to find later on the list page.
3. Related Features
| Feature | Description | Link |
|---|---|---|
| Inbound List | View and track the progress of all incoming stock | Go |
| Inbound Details | View the counting, putaway and discrepancy details of a shipment | Go |
| Edit Inbound | Modify an inbound order before the goods are received | Go |
| Inbound Process | Complete inbound process guide | Go |