Upload Labels
Table of Contents
- 1. Use Cases — 2 common scenarios
- 2. Feature Guide — Upload Process / CSV Mapping File / Preview & Confirm
- 3. FAQ — FAQ + Important Notes
- 4. Related Features
1. Use Cases
Quick Links: Ship with Self-Provided Platform Labels | Add Missing Tracking Numbers
Scenario 1: Ship Using Labels You Generated on Shopee or momo
Situation: You have already generated dedicated shipping labels for your orders in a platform admin such as Shopee or momo (a shipment is the delivery document handed to the carrier). These labels must be affixed to the packages exactly as issued for the carrier to accept them. The warehouse does not have these labels and cannot regenerate them, so the orders are stuck and cannot be shipped.
Use this feature: Upload the platform-generated label files to the warehouse. The system matches each label to its package by fulfillment name (a fulfillment is the shipping task the warehouse creates based on your order). The warehouse can then print and affix the same label and ship directly, without regenerating anything.
Result: A shipment is created for each fulfillment, so the warehouse can ship using the labels you provided. These shipments appear in "Shipments" with their "Source" marked as "Manual Upload", distinguishing them from shipments the system created automatically.
Scenario 2: Add Tracking Numbers for Shipments Completed Outside the System
Situation: For some orders you completed the shipment and obtained the tracking number directly on a platform or another tool, and those numbers never flowed back into the system. When a customer asks "where is my package", you cannot find the tracking number in the system and have to look it up order by order in the platform admin.
Use this feature: Prepare a mapping file containing only the fulfillment name and tracking number (no label file) and upload it. The system creates shipments for those fulfillments and records the tracking numbers.
Result: These tracking numbers are consolidated back into the system. From then on you can look up delivery status across all channels in one place under "Shipments" and respond to customer inquiries without digging through each platform.
2. Feature Guide
When your shipping labels are generated outside the system (a platform admin or a third-party tool), the warehouse does not have them and cannot ship. This feature lets you upload the label files to the warehouse and match them to fulfillments so the warehouse can print and ship directly; you can also upload tracking numbers only, consolidating delivery information for shipments completed outside the system. Uploading has three steps — Upload Labels, Upload Mapping, and Preview & Confirm — and you can review the matching results before submitting.
Quick Navigation: Upload Process | CSV Mapping File | Preview & Confirm
2.1 Upload Process
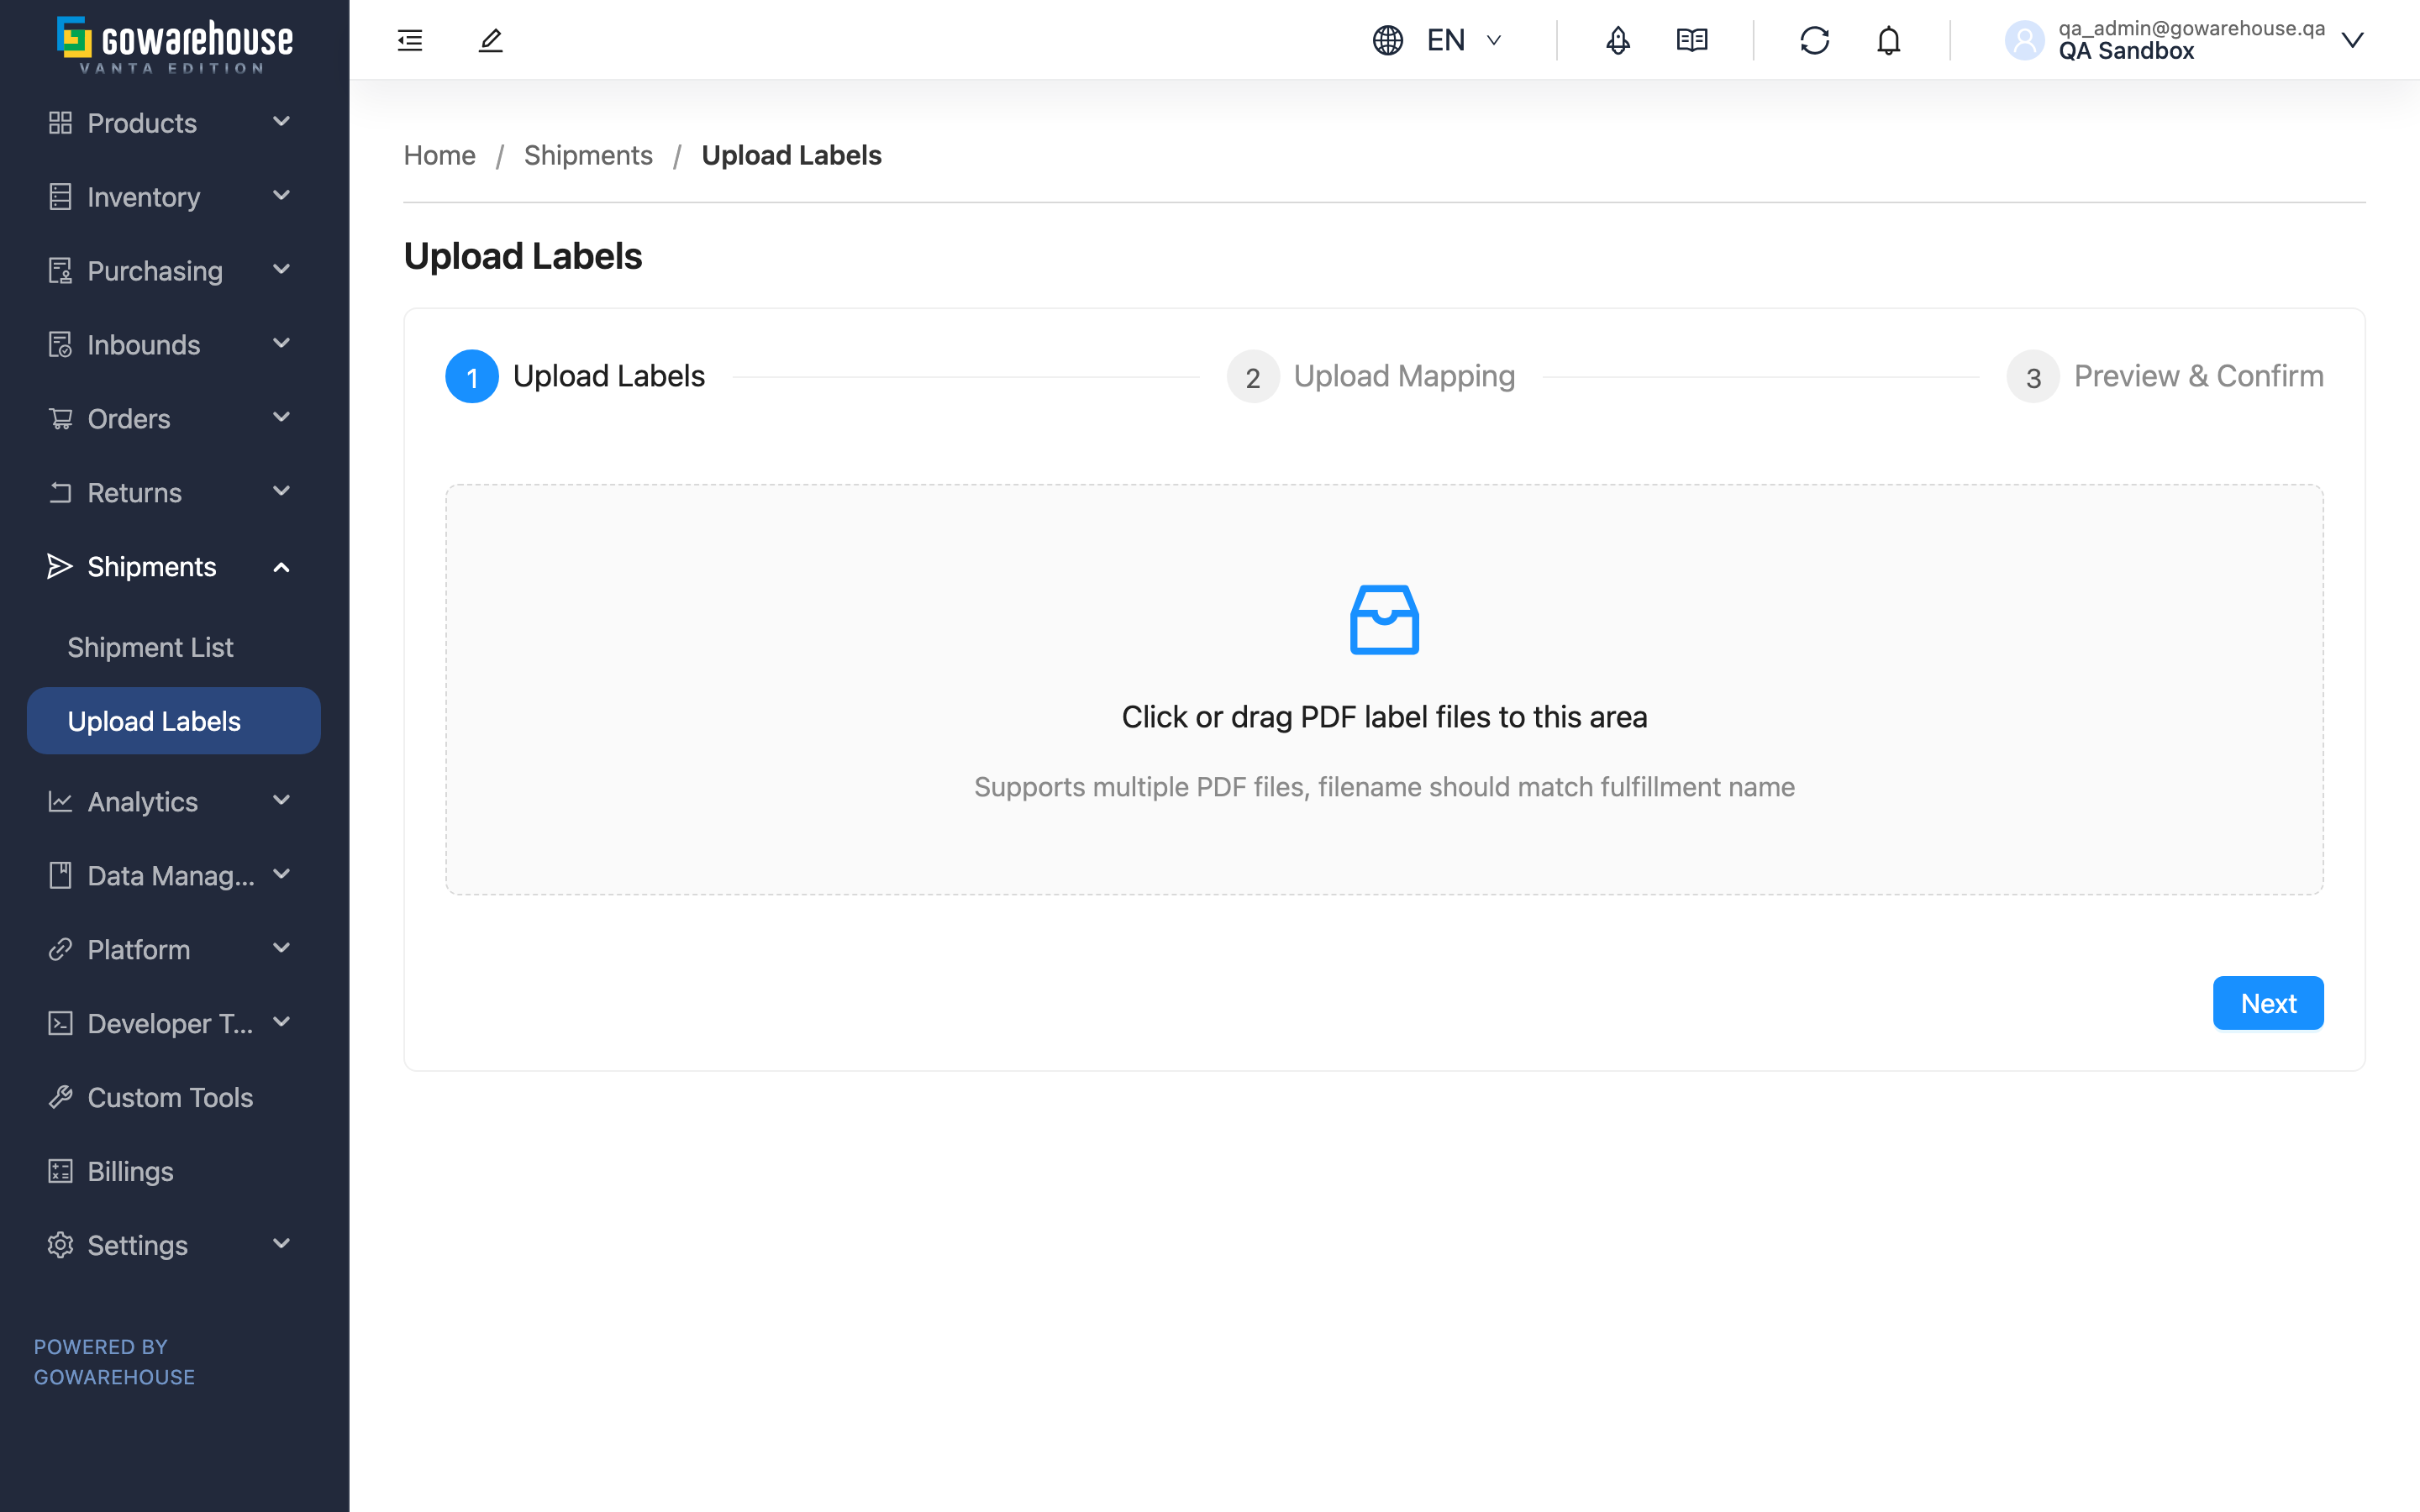
Uploading has three steps: "Upload Labels" → "Upload Mapping" → "Preview & Confirm".
▸ Step 1: Upload Labels
Drag files to the upload area or click to select files; you can select multiple at once. The system only accepts PDF files and rejects non-PDF ones; duplicate filenames are automatically skipped and not added again.
If a label's filename is the fulfillment name (e.g., ORD-20250328-001.pdf), the system can match by filename directly, and you can skip uploading a mapping file in the next step.
▸ Step 2: Upload Mapping (Optional)
The mapping file specifies which fulfillment each label file corresponds to, and can carry tracking numbers. See CSV Mapping File.
This step is optional: if the filenames from the previous step are already fulfillment names, you can skip the mapping file and go straight to preview; you only need a mapping file when you want to add tracking numbers, or when filenames differ from fulfillment names.
▸ Step 3: Preview & Confirm
Before showing the preview, the system validates whether each fulfillment name exists among your fulfillments, then lays out the label-to-fulfillment matching results in a table for you to confirm. See Preview & Confirm.
2.2 CSV Mapping File
Fields marked with * are required
The mapping file has three columns. Click the "Download Template" button in Step 2 to download a template with examples, then fill it in.
| Column | How to Fill | Notes |
|---|---|---|
| *Fulfillment Name | Enter the fulfillment name in the system | Required. The system matches by this column; names not found are marked "Fulfillment not found" |
| Tracking Number | Enter the tracking number | Optional. Recorded on the corresponding shipment |
| Filename | Enter the corresponding label filename | Optional; must include the extension (e.g., .pdf) to match a file; leave empty to record only the tracking number without a label |
📌 Note: Matching is based on the "fulfillment name", not the order number. One order may be split into multiple fulfillments shipped in batches due to stock shortages or merged shipping, and each label corresponds to "one outgoing package", so the system matches by fulfillment to ensure every label goes on the right package. If you are unsure of a fulfillment name, expand the order in the Order List to view its fulfillments.
2.3 Preview & Confirm
The preview table shows, row by row, the fulfillment name, tracking number, filename, match status, and upload result. The match status determines whether a row will be uploaded when you submit:
| Match Status | Meaning | After Submit |
|---|---|---|
| ✓ (green check) | Label matched to a fulfillment (or no file, tracking number only); ready to upload | Creates a shipment |
| Manually matched | Originally unmatched; you searched and assigned a fulfillment on the preview page | Creates a shipment |
| File missing | The filename in the mapping file was not found among the uploaded files | Still creates a shipment, but records only the tracking number without a label |
| Fulfillment not found | The name was not found among your fulfillments | Not uploaded, and does not affect other rows |
▸ When a Fulfillment Cannot Be Matched: Assign Manually
When a row shows "Fulfillment not found" (in red), you do not need to start over:
- Click the fulfillment name field on that row and enter a keyword to search (at least 2 characters)
- Select the correct fulfillment from the results
- Once the status changes to "Manually matched", that row will be uploaded along with the rest
Rows still showing "Fulfillment not found" will not be uploaded.
▸ Confirm Upload
After clicking "Confirm Upload", the system creates shipments one by one. The "Upload Result" column shows each row's "Uploading", "Upload successful", or "Upload failed" (with the reason on failure) in real time, and the "Overall Progress" at the top tallies the success and failure counts. If everything succeeds you are returned to the previous page automatically; if any row fails, you stay on the preview page so you can see clearly which rows need attention.
3. FAQ
Quick Navigation: FAQ | Important Notes
3.1 FAQ
▪ Is it mandatory to upload a CSV mapping file?
No. If the label filenames are already fulfillment names, the system matches by filename directly and you can skip the mapping file. You only need a mapping file when filenames differ from fulfillment names, or when you want to add tracking numbers. See Upload Process.
▪ Why does matching use the "fulfillment name" instead of the order number?
Because one order may be split into multiple fulfillments shipped in batches, and each label corresponds to a single package. See the Notes under CSV Mapping File for the full explanation. If you are unsure of a name, expand the order in the Order List to view its fulfillments.
▪ Can I upload only tracking numbers without label files?
Yes. Fill in the fulfillment name and tracking number in the mapping file and leave the filename column empty. The system creates shipments for the fulfillments and records the tracking numbers, without attaching label files.
▪ What file formats are supported?
Label files: PDF only. Mapping file: CSV (supports non-English characters). Non-PDF label files are rejected on upload.
▪ Can I upload labels multiple times for the same fulfillment?
Yes. Each upload creates a new shipment for that fulfillment, and the system does not block duplicates, so avoid uploading the same label more than once to prevent redundant shipments.
▪ What should I do about failed uploads?
Failed rows show "Upload failed" with the reason in the "Upload Result" column of the preview table; rows showing "Fulfillment not found" mean the name could not be matched and can be assigned manually right on that row. Other successful rows are unaffected.
▪ Where can I view shipments after uploading?
Go to "Shipments" to see the newly created shipments; you can also view the associated shipments on the detail page of the corresponding order, where their "Source" shows "Manual Upload".
3.2 Important Notes
⚠️ Important Reminders
- Confirm the matches and contents on the preview page before submitting; once a shipment is created, contact the warehouse for assistance if corrections are needed
- Each upload adds a new shipment and the system does not block duplicates, so uploading the same label repeatedly creates redundant shipments
💡 Tip: Name the label files directly with the fulfillment name (e.g., ORD-20250328-001.pdf) to skip creating a mapping file and let the system match automatically.
4. Related Features
| Feature | Description | Link |
|---|---|---|
| Shipment List | View the shipments created after upload and their delivery status | Go |
| Order List | Expand orders to view their fulfillment names to prepare the mapping file | Go |