New Inbound
Contents
1. Feature Guide
When a supplier delivers goods but there is no matching inbound in the system yet (for example, the merchant calls about an arrival at the last minute, or a package shows up on the dock), create one here by hand to record what this delivery is expected to contain. Pick the merchant first to enter the form, fill in the Inbound Name, Inbound Type, and ETA, then add the products and quantities you expect to receive. Once created, the inbound is in "Pending" status, and you can head to "Inbound Acceptance" to start verification.
Quick Jump: Select merchant and warehouse | Inbound basics | Inbound items | Create and batch registration
1.1 Select Merchant and Warehouse
When you enter the page, a "Select Merchant" screen appears first; choose the merchant this inbound is for:
- You only enter the form after picking a merchant; if you serve a single merchant, it is selected automatically.
- Once in the form, the tag at the top of the page shows the warehouse you are working in — the inbound is created in this warehouse and cannot be changed on the form.
- Product search and Inventory Type options switch with the selected merchant, showing only that merchant's own data.
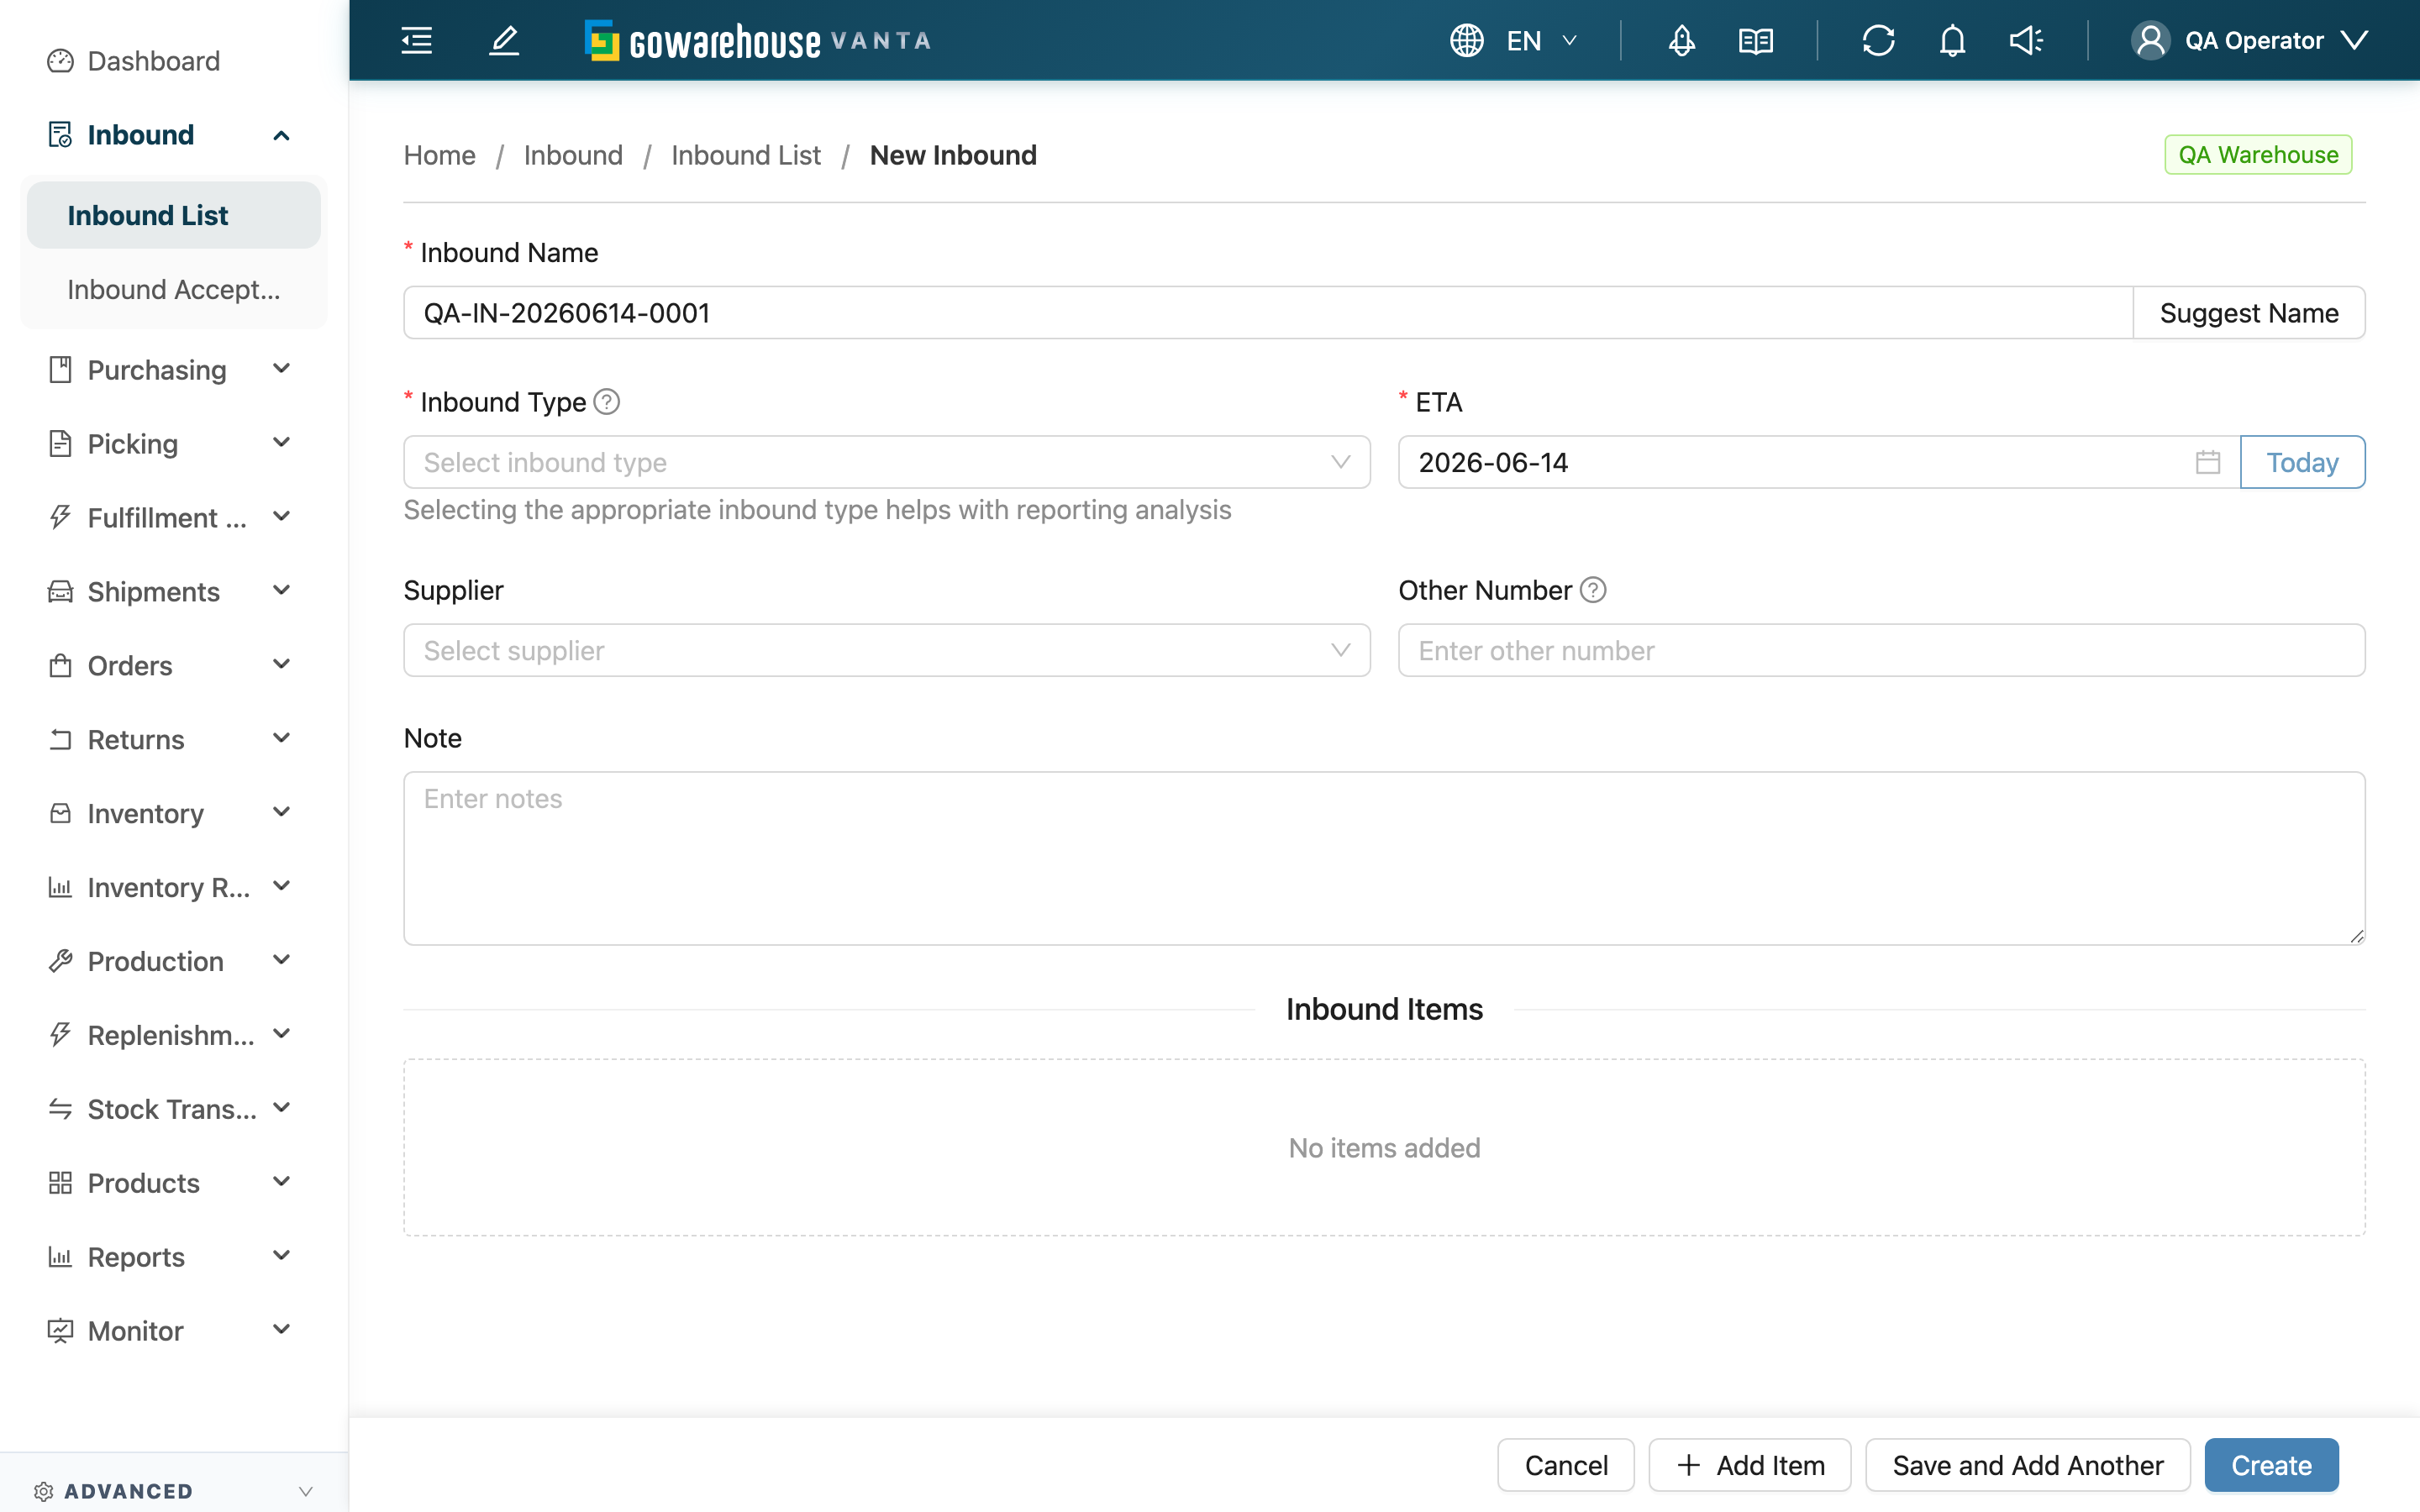
1.2 Inbound Basics
Fields marked with * are required
| Field | How to Fill | Notes |
|---|---|---|
| *Inbound Name | Enter an easy-to-recognize number, or click "Suggest Name" to have the system generate one | Must be unique within the merchant |
| *Inbound Type | Choose one of "Receiving", "Sales Return", "Production" | Regular incoming goods: "Receiving"; customer returns: "Sales Return"; processed finished goods: "Production" |
| *ETA | Pick the date this delivery is expected to arrive; for same-day arrivals click "Today" | Cannot pick a date earlier than today |
| Supplier | Pick the supplier of this delivery from the list | If missing, create it first in "Supplier List" |
| Other Number | Enter a PO number, tracking number, or other third-party system number for later reconciliation | Optional |
| Note | Note any special reminders, such as refrigeration, fragile, or split deliveries | Optional |
1.3 Inbound Items
Click "Add Item" to add a product line; each inbound needs at least one item to be created. Fill in each line as follows:
Fields marked with * are required
| Field | How to Fill | Notes |
|---|---|---|
| *Product | Search by SKU or product name, then select | Only this merchant's products appear; if missing, create it first in "Product List" |
| *Inventory Type | Pick which inventory category this stock belongs to | Options depend on merchant settings; if there are none, add them in that merchant's inventory type settings first |
| *Total Quantity | Enter the total quantity you expect to receive for this item | Cannot be less than 0 |
| Batch | Enter the batch number for this delivery | Can be left blank when creating; fill it in during verification when the goods arrive |
| Manufacturing Date | Pick the manufacturing date | Only appears when the product has expiry-related settings; can be left blank when creating |
| Expiration Date | Pick the expiration date | Only appears when the product has an expiry period; can be left blank when creating |
| Inventory Custom Attributes | Fill in the fields defined by the merchant | Only appears when the merchant has defined extra attributes; can be left blank when creating |
Each line has a "Delete" on the right to remove the whole line. If you add the wrong product, just delete that line and re-add.
💡 Tip: Batch, Manufacturing Date, Expiration Date, and Inventory Custom Attributes can always be left blank at creation — even if the product has these set as required, creation will not block you. An inbound records "what is expected to arrive"; the real batch and expiry are only known once the goods arrive and you count them during verification on the dock. Forcing them at creation would only push you to enter a made-up value. These required fields are checked later, when you finalize that batch in "Inbound Acceptance".
1.4 Create and Batch Registration
There are three buttons at the bottom after you finish:
- Add Item: Add another product line.
- Create: Create this inbound. On success, you go straight to its detail page in "Pending" status, ready for verification.
- Save and Add Another: Use this when several deliveries from the same merchant arrive at once and you need to create several inbounds in a row. It saves the current one, then clears the form so you can fill in the next without leaving the page. For the last one, switch to "Create" to finish.
2. FAQ
Quick Jump: FAQ | Important Notes
2.1 FAQ
▪ What if product search can't find the item I need to receive?
Product search only shows the currently selected merchant's products. If the item isn't registered yet, create it first in "Product List", then come back to this page to search and add it.
▪ The Inventory Type dropdown is empty — what do I do?
Inventory Type is configured per merchant. If this merchant has no inventory types set up, the dropdown will be empty; add them in that merchant's inventory type settings first, then return to this page.
▪ Can I leave batch, expiration date, and manufacturing date blank?
Yes. These fields can always be left blank at creation, even if the product marks them as required. Fill in the real batch and expiry when the goods arrive, during verification in "Inbound Acceptance"; the system only checks required fields when you finalize that batch. See the tip in 1.3.
▪ How do I choose the Inbound Type?
Regular incoming goods from a supplier: "Receiving"; customer returns going back into stock: "Sales Return"; your own processed finished goods: "Production". Choosing the right type helps later reports distinguish goods by source.
▪ What does "Suggest Name" produce?
Clicking it fills the Inbound Name field with a unique suggested number, so you don't have to come up with one yourself. You can still edit it afterward into your preferred format.
▪ Several deliveries arrived at once — how do I create many inbounds?
After finishing the first one, click "Save and Add Another"; the system saves it and clears the form so you can fill in the next, without leaving and re-entering for each. See 1.4.
▪ Why can't I pick a past date for the ETA?
The expected arrival date tells the warehouse when goods will arrive so receiving staff can be scheduled, so only today or later can be selected. For same-day arrivals, click "Today".
▪ Can I edit it after creation?
Yes, but only while in "Pending" status. Once verification starts (after it moves to receiving), the inbound's contents can no longer be changed. While it hasn't been verified yet, go to "Edit Inbound" to change the name, type, items, and so on.
▪ I picked the wrong merchant — can I switch it after creation?
No. Products and stock are already bound to the merchant chosen at creation, so the merchant can't be changed afterward. If not yet created, click "Change" at the top of the page to reselect; if already created, cancel that inbound and recreate it under the correct merchant.
2.2 Important Notes
⚠️ Reminders
- Confirm the merchant and warehouse shown at the top before creating; the merchant can't be changed afterward.
- After clicking "Create", the inbound takes effect immediately (enters "Pending"); double-check the contents before creating.
- Total Quantity is "how much is expected to arrive"; the actual amount received is determined by the count during verification, and the two may differ.
3. Related Features
| Feature | Description | Link |
|---|---|---|
| Edit Inbound | Modify the inbound's contents while in "Pending" status | Go |
| Inbound Acceptance | Verify and count goods after arrival, recording the actual batch and expiry | Go |
| Inbound List | View and filter all inbounds | Go |
| Import Inbound | Import many inbounds at once | Go |
| Product List | Create or maintain the merchant's product data | Go |