
Edit Label Template
Table of Contents
1. Feature Overview
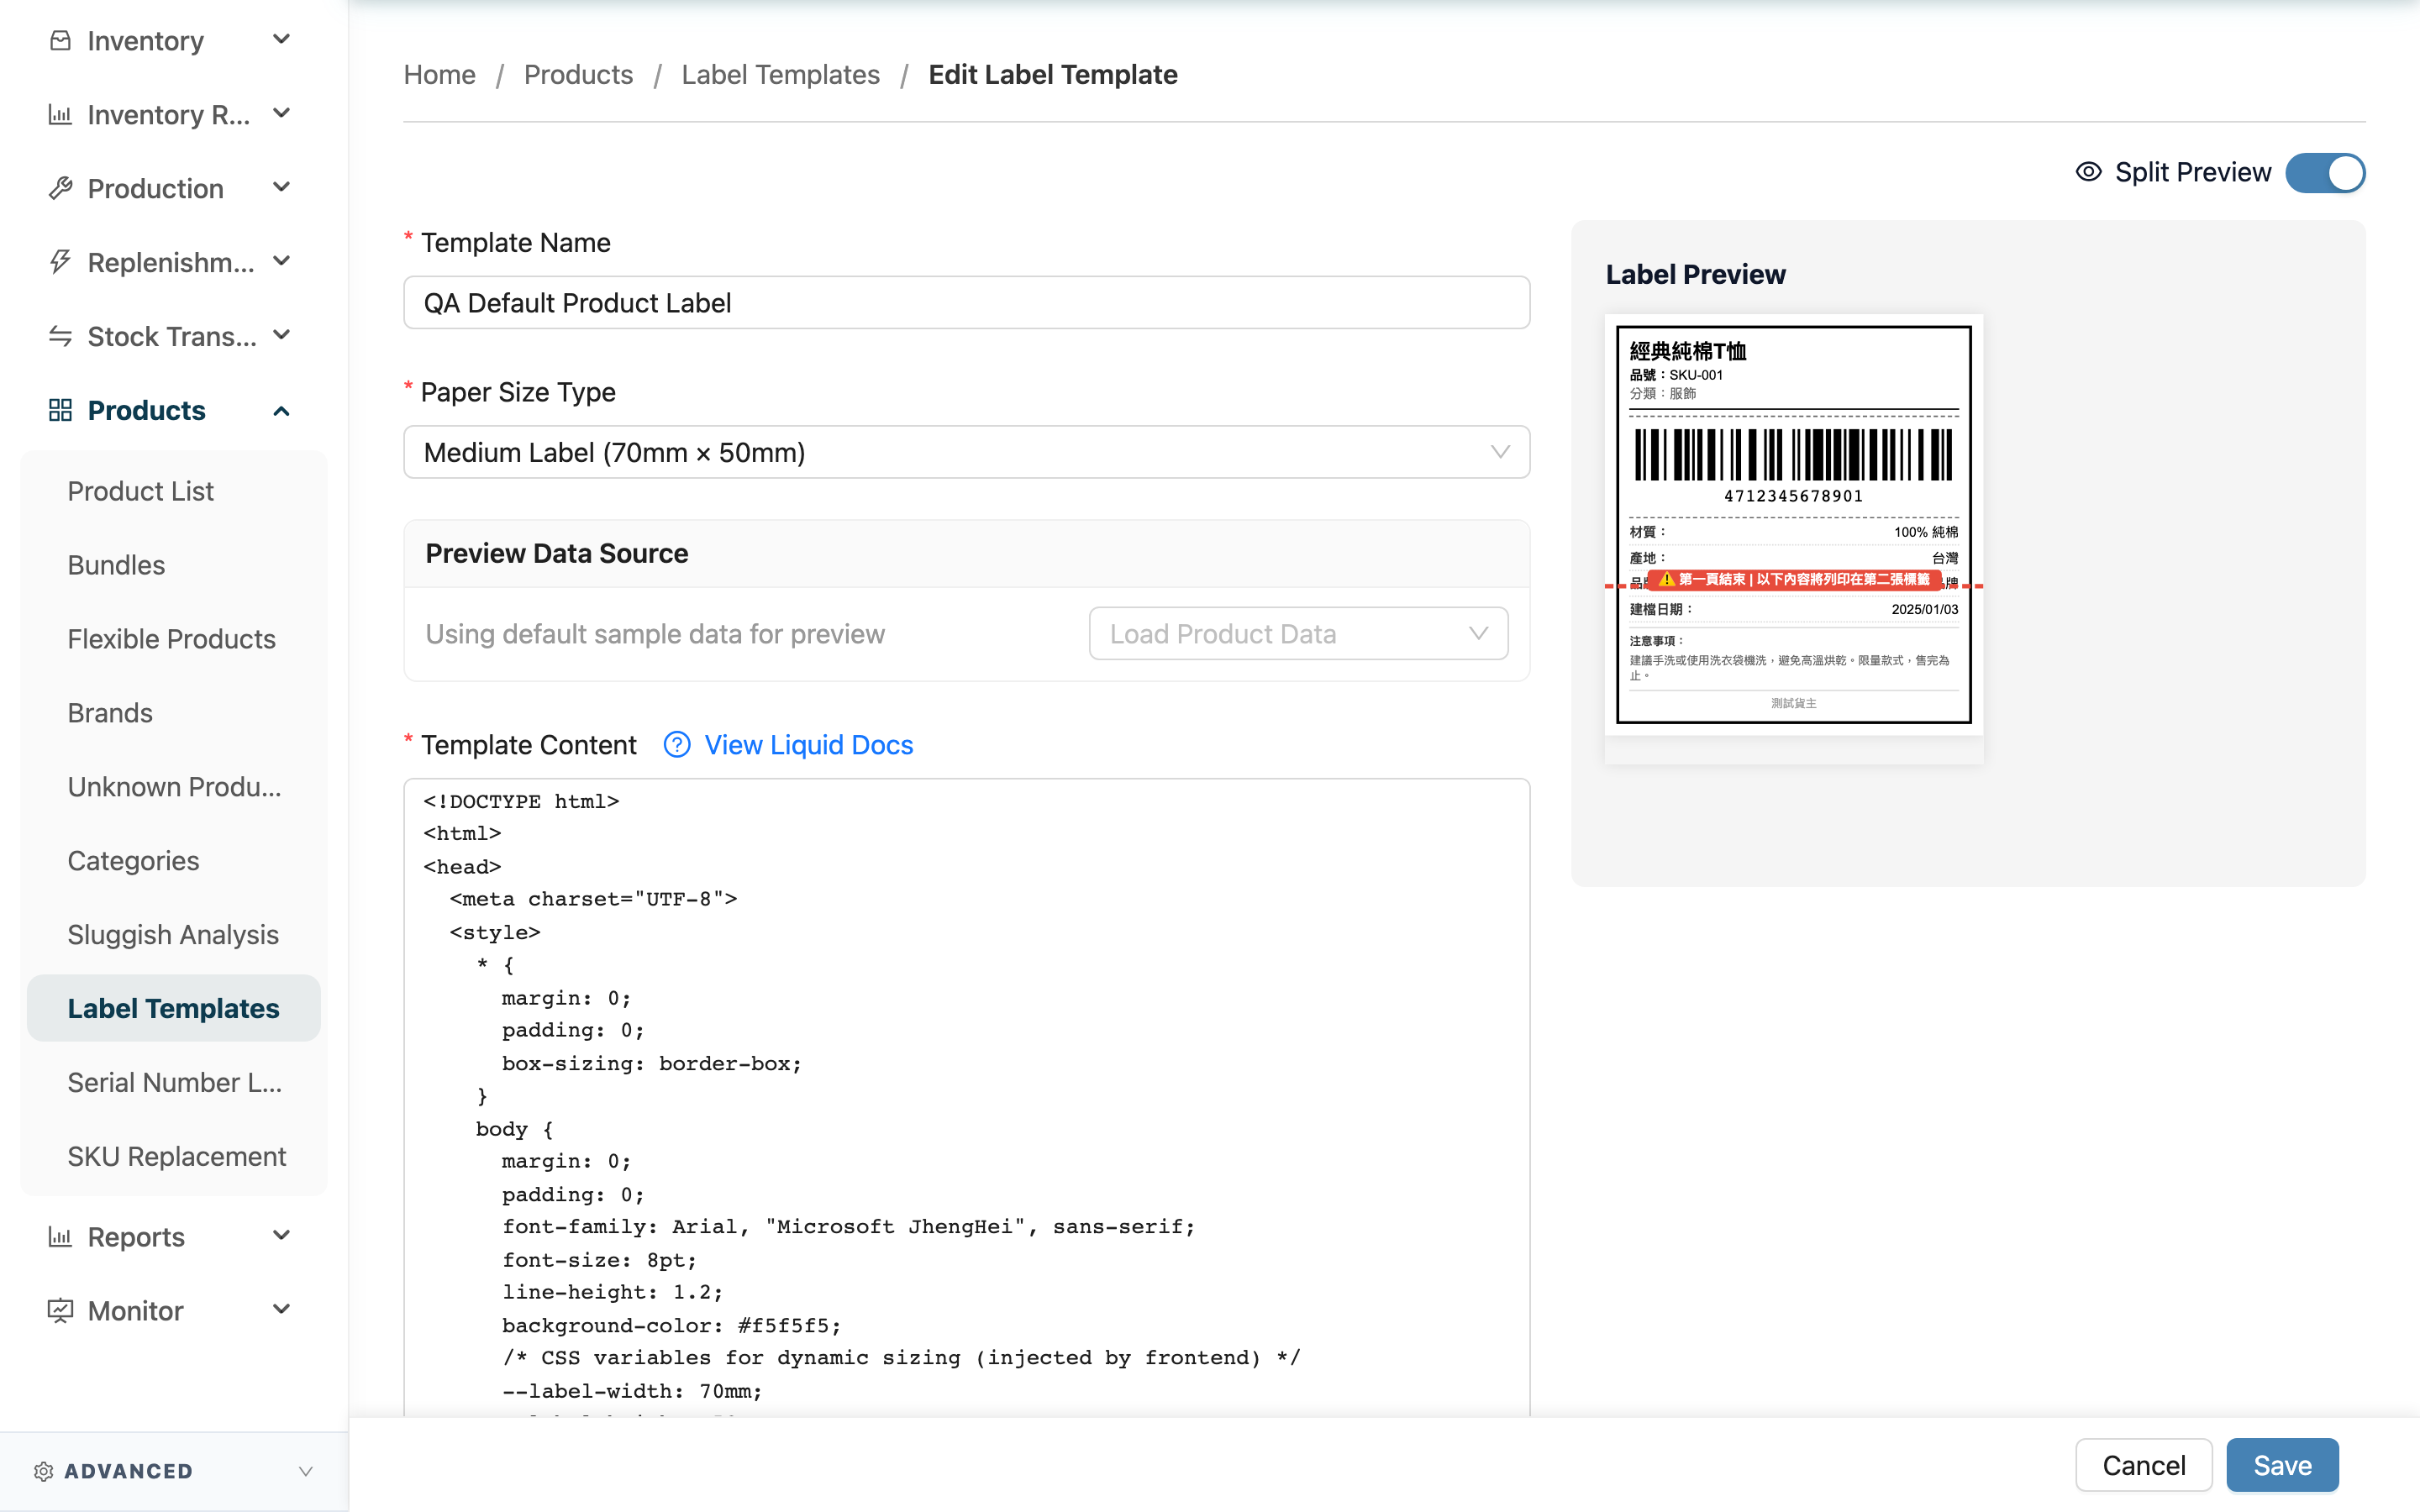
Adjust an existing label template: rename it, change the paper size, re-arrange the layout, add or remove the fields to print, or set whether it is the default. The right side shows a live preview—edit and see the label as you go. After saving, labels printed with this template afterward use the new layout.
Quick jump: Edit fields | Preview data source | Preview the label | Save
1.1 Edit fields
Fields marked with * are required.
| Field | How to fill | Notes |
|---|---|---|
| *Template Name | Change the template name | Required |
| *Paper Size | Re-select a sticker size: small/medium/large label, A4, A5, or custom | A built-in size fills in width and height automatically; only "custom" needs manual entry |
| Paper Width (mm) / Paper Height (mm) | Appears only for "custom"; enter the sticker's actual width and height | Must be greater than 0 |
| *Template Content | Re-arrange the label layout, adding or removing the fields to print | Required; can use the data listed in Printable product fields |
| Is Default | Check to set it as this merchant's default template | A merchant can have only one default; a duplicate is blocked |
| Description | Add or change the purpose notes | Optional |
The template content uses Liquid syntax for layout, and a "View Liquid Docs" link next to the field provides syntax reference.
1.2 Preview data source
The preview uses a set of sample product data by default. To see how the layout looks with a real product, use "Load Product Data" in "Preview Data Source" to pick an actual product; click "Reset to Sample Data" to switch back to sample data. This choice only affects the preview, not the template itself.
1.3 Preview the label
The Split Preview on the right is on by default and updates live as you edit; you can collapse it with the toggle at the top right. Clicking "Preview" opens a larger preview window for examining the layout in detail.
1.4 Save
Once edited, click the save button at the bottom; on success you return to the template's detail page to confirm the latest layout.
2. FAQ
2.1 FAQ
▪ If I edit a template, do already-printed labels change too?
No. A printed or downloaded PDF is a file generated at that moment and is separate from the template. Edits only affect labels printed with this template afterward.
▪ Why can't I save—it says there is already a default template?
Each merchant can have only one default template. If you checked "Is Default" but the merchant already has another default, the system blocks it. Unmark the default on that template first, then save.
▪ Will changing the paper size break the existing layout?
The layout content is not re-arranged automatically, but a larger layout moved to a smaller sticker may not fit. After changing the size, check the right-side preview and adjust the content if needed.
▪ I want to see the effect on a particular real product?
Load that product with "Load Product Data" and the preview switches to its data. This only affects the preview and does not change the template.
2.2 Notices
⚠️ Important
- Template name, paper size, and template content are required; saving fails if any is missing.
- Each merchant can have only one default template; a duplicate is blocked.
- For a custom size, both width and height must be greater than 0.
💡 Tip: Before a major layout change, load a real product with the most complete data to preview—it's easier to spot which fields don't fit or have shifted position.
3. Related Features
| Feature | Description | Link |
|---|---|---|
| Label Templates | Return to the list of all templates | Go |
| Product List | Choose a template on a product and print labels | Go |